







Showing posts with label Crafts. Show all posts
Showing posts with label Crafts. Show all posts
Monday, April 19, 2010
Utilizing local sales papers and coupons
Check out my latest article on Examiner.com on how you can make the most of budget crafting by utilizing local sales papers and coupons.

Wednesday, March 18, 2009
what i've been crafting lately
Besides the fact that I'm having some sinus issues and fluid in my ears (resulting in some dizziness and medicine that makes me extremely groggy), I have been enjoying my Spring Break. There are probably a million things I could be doing around the house, but I'd rather spend my time crafting. Okay, so I'm balancing both - don't worry, I'm not avoiding my responsibilities. But, hey, this is Spring Break. I'm supposed to be enjoying it, right?
Here are two of several projects I've done this week:


While surfing the web, I found a great idea by Keri Smith. She listed a post of 100 ideas to try to boost your creativity. I wanted to document my interpretation of these ideas, so I created an odd-shaped journal. Keri provides a PDF of all the ideas, which I downloaded and printed off. I then glued each idea on a separate page. Something neat for when I'm in a creative stump.


Here are two of several projects I've done this week:
While surfing the web, I found a great idea by Keri Smith. She listed a post of 100 ideas to try to boost your creativity. I wanted to document my interpretation of these ideas, so I created an odd-shaped journal. Keri provides a PDF of all the ideas, which I downloaded and printed off. I then glued each idea on a separate page. Something neat for when I'm in a creative stump.
Another thing I've been working on is a new cover for my Bible. Before I went on summer missions to Virginia in 2002, I bought myself a New Living Translation Bible. I loved it! First, the translation was beautiful. Second, the Bible was tiny, so it could easily fit in my purse or backpack. Since then, this particular Bible has been with me all over the U.S. and to Russia. I couldn't part with it even though it was becoming worn.
For my birthday two years ago, Jason bought me a new Bible. Oh it was fine, but I felt odd setting my little friend aside. Granted, the Bible is the Bible. The words do not change. But, have you ever read a book before, fell in love with it, and no other printing of it compares to your dog-eared copy that you grew to love?
I also feel this way about my Chronicles of Narnia books that my mother bought for me from a Scholastic Book Club when I was in 2nd grade. This was long before Narnia ever became a movie. In fact, this was so long ago that the books were numbered according to the time they were published. So, the first book was the not the first book chronologically, but the first book C.S. Lewis published in the series. And, that's how I read the entire series. Completely out of chronological order, but in the order the author intended. I couldn't imagine reading it any other way. Alas, those books became worn over time (and I lent one of them to an ex-boyfriend who wasn't an ex at the time, but then we broke up and things were awkward...and needless to say, I lost the book). I considered replacing them, but couldn't bring myself to do it. I did manage to find a used copy online that looks exactly like the others.
All of this to say...that's how much THIS copy means to me. And, it's been sitting in my project pile waiting for a chance to be used again.
You just don't know how much this excites me. Seriously. I completely understand the line in You've Got Mail where Meg Ryan smiles joyously about "bouquets of freshly sharpened pencils."
For my birthday two years ago, Jason bought me a new Bible. Oh it was fine, but I felt odd setting my little friend aside. Granted, the Bible is the Bible. The words do not change. But, have you ever read a book before, fell in love with it, and no other printing of it compares to your dog-eared copy that you grew to love?
I also feel this way about my Chronicles of Narnia books that my mother bought for me from a Scholastic Book Club when I was in 2nd grade. This was long before Narnia ever became a movie. In fact, this was so long ago that the books were numbered according to the time they were published. So, the first book was the not the first book chronologically, but the first book C.S. Lewis published in the series. And, that's how I read the entire series. Completely out of chronological order, but in the order the author intended. I couldn't imagine reading it any other way. Alas, those books became worn over time (and I lent one of them to an ex-boyfriend who wasn't an ex at the time, but then we broke up and things were awkward...and needless to say, I lost the book). I considered replacing them, but couldn't bring myself to do it. I did manage to find a used copy online that looks exactly like the others.
All of this to say...that's how much THIS copy means to me. And, it's been sitting in my project pile waiting for a chance to be used again.
You just don't know how much this excites me. Seriously. I completely understand the line in You've Got Mail where Meg Ryan smiles joyously about "bouquets of freshly sharpened pencils."
Saturday, March 14, 2009
Inside the Craft Studio
Here's my happy place, the place I often retreat to after a long, hard day. I spent last week cleaning and organizing, so it's a very calming and enjoyable place now. I really work much better in an organized space.
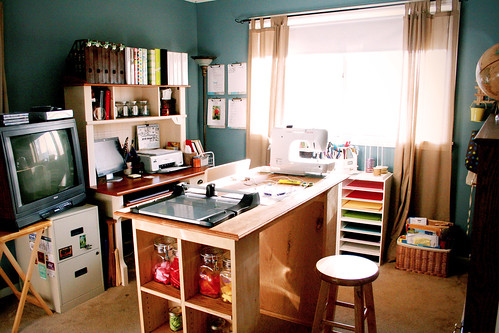
The studio serves as both an office and a craft space. The table in the middle was a birthday present from my wonderful husband who snuck over to my dad's house and MADE THIS! I was completely surprised! It still needs to be painted and stained (to match the computer desk). Jason made it high enough so I could stand as I work (which I often like to do). But when I'm tired, I can sit on the stool (another gift I received on Valentine's Day - my man really knows how to win me over!).
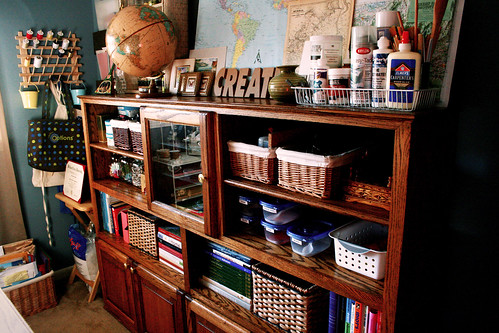
When I was in college I complained to my Dad that I was very tired of the cheap, plastic shelving that was sagging under my wealth of books. So, his response was to make me a cabinet out of oak. I am truly blessed to be surrounded by such giving and talented men! Since we have a piano in our dining room, this beauty became part of the craft room. And, yes, it is extremely difficult to move since it is so heavy. The glass cabinet in the center holds my panda collection. The baskets hold various crafting supplies. On top of this (which by the way has always been called the "mini-shrunk" since it resembles a shrunk my parents had) is my collection of various souvenirs and maps.
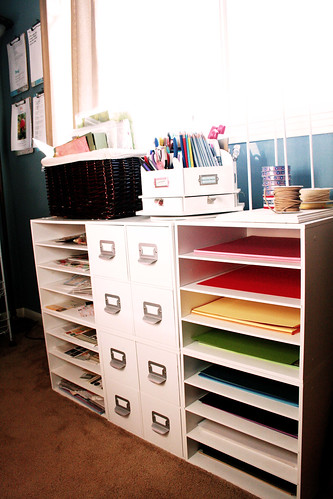
This is a set of six cubbies from Target that were a Christmas gift. I absolutely love this. For around $120 I got a great looking (and adaptable) storage unit. Right now I use one side to store my cardstock by color. The other side has embellishments sorted by themes (Christmas, birthday, baby, love, etc.). I need to get some trays or plastic containers for it, though. The center cubes hold various supplies. Three of the drawers are dedicated to my three favorite brands (American Crafts, Making Memories, and Heidi Swapp). I like to keep those alphabet stickers and embellishments separate since I use them often. Another drawer houses all of my letter stickers. The remaining four drawers house my wooden and foam stamps.
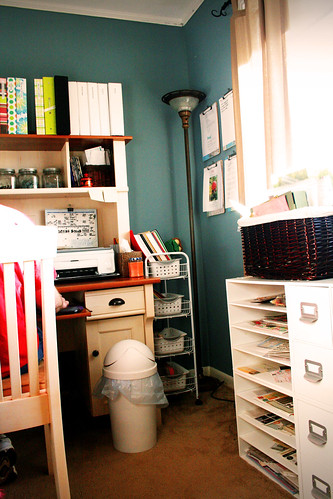
Here's the corner of the office by the computer desk. (No that's not where I normally store my trash can. I was just lazy and didn't bother to put it back for the picture.) The white metal rolling cart holds inexpensive white tubs from Target. Inside the tubs are cardstock and patterned paper scraps. I have cardstock in 8.5x11, 8x8, and 4x6. I cut my patterened paper and cardstock scraps down to 4.5x5.5 which is the perfect size for the front of a standard sized card. This really has helped me cut down on the amount of scraps that pile up and never get used.
Also, you can see that I have clipboards hanging on the wall. I'll explain those in more detail next.
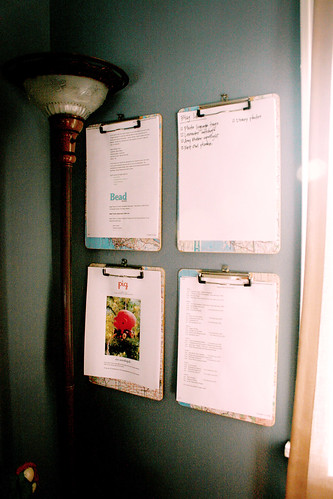
Also, you can see that I have clipboards hanging on the wall. I'll explain those in more detail next.
I really love to be organized. I have so many ideas, schedules, and lists running through my head that needed to be organized. But, I'm also a very visual person and preferred to have things out in the open so I can remember them. This is the perfect solution for me. I bought some inexpensive clipboards from the local store (I think these cost my $0.97 a piece) and used gel medium to adhere maps. I love maps and have them throughout my studio, so using maps was the perfect thing. Now I have a cute and organized way to see exactly what I'm working on and what's coming up.
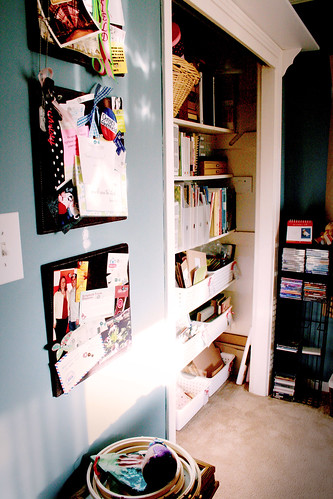
To the right of the door (left if you are walking in) is my inspiration boards and closet. The inspiration boards are chocolate brown corduroy bulletin boards I picked up on clearance at Target. Underneath the boards is a small table holding current craft projects.
I absolutely love the closet! The previous owners (actually two owners ago) added some extra shelves for their child's closet. We improved upon that and added one more to make five shelves. The shelves can easily be removed if we ever sell the house (we also kept the clothing rod). Originally the closet had sliding doors that made it very difficult to reach everything in the closet. So, I decided to remove the doors. I hated the closet before, but now I love it. Everything is accessible and in plain sight. I tend to use my supplies when I can see them. We saved the doors, of course. They're in the storage room. The closet holds my fabric, felt, gift bags and wrapping paper, office supplies, patterned paper, craft books, etsy items, chipboard, vintage books for mixed media projects, small embellishments, acrylic paints, canvases, and mini albums waiting to be transformed.
I absolutely love the closet! The previous owners (actually two owners ago) added some extra shelves for their child's closet. We improved upon that and added one more to make five shelves. The shelves can easily be removed if we ever sell the house (we also kept the clothing rod). Originally the closet had sliding doors that made it very difficult to reach everything in the closet. So, I decided to remove the doors. I hated the closet before, but now I love it. Everything is accessible and in plain sight. I tend to use my supplies when I can see them. We saved the doors, of course. They're in the storage room. The closet holds my fabric, felt, gift bags and wrapping paper, office supplies, patterned paper, craft books, etsy items, chipboard, vintage books for mixed media projects, small embellishments, acrylic paints, canvases, and mini albums waiting to be transformed.
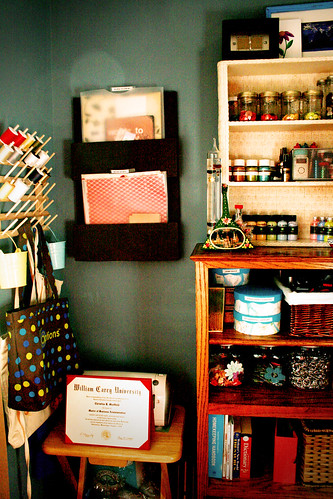
In the opposite corner of the room I have a bunch of my favorite things. My thread spools are on the wall, as well as a Pottery Barn organizer that I got on clearance for $15. I use that to house future projects. I have two more on the other side of the cabinet. I also ashamedly stuck my mba diploma on a folding dinner table that holds my cricut machine. I really couldn't think of anywhere to put it when I earned it, and it's kind of stuck there now. Collecting dust. Which is exactly what that degree is doing in real life since I'm not using it at the moment. :)
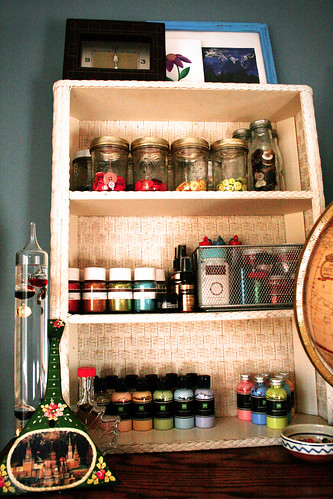
I'm extremely proud of this. I found this wicker shelf unit in my laundry room when I bought the house. I couldn't think of anything to do with it and was going to donate it. But then Making Memories came out with their embellishment storage center. Which I loved, but couldn't afford. A-ha! Lightbulb moment. So, I cleaned the shelves and stuck it on my cabinet. It now holds my lovely paints, glitters, and buttons.
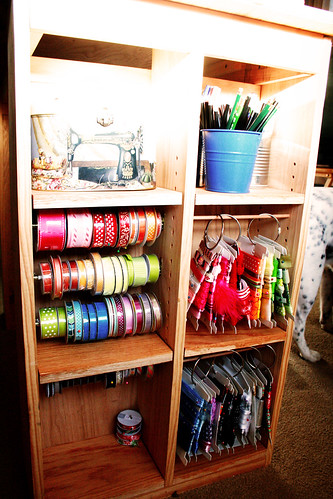
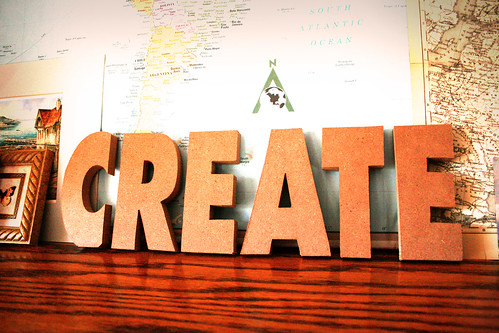
The side of my table houses all of my ribbons. One side (not pictured) has jars full of little ribbon bits sorted by color. That's the ribbon that is too short to go around ribbon cards, but long enough to use on small projects. This side has my ribbon spools and other ribbon. Longer bits of ribbon that isn't on a spool is wrapped around ribbon cards from Cropper Hopper. And, yes, they are sorted by color. The cards are stored on large binder rings hooked to dowel rods.
The ribbon spools was my most recent project. I tried storing the spools on dowel rods but found that if I made the rods long enough to fit in the pre-drilled holes, I ended up scraping the sides each time I took the rod off. Which I would have to do when I used up a ribbon or added more. Not a big deal now, but once the table is painted I would end up with a scrape. Not cool.
Fortunately I had bought some curtain rods a while back that I had been meaning to return to the store. Never got around to it, but that's okay because I found a way to use them here. Now, these rods hook onto metal plates that are screwed into the wall. So, they lay flat. That wasn't going to work for me, however, because I didn't want to screw the plate into the back of the desk. I wanted it on the sides. Because I'm thrifty, and pretty determined, I found a way to make it work. I simply got my pliers out and bent the piece that sticks out (that you put the rod on) out a little, so that I could still use the rod. That explanation probably makes no sense, so I'll try and post a tutorial on that. Anyway, to put it in simple terms - it worked and I now have a great storage space for ribbon spools.
This side also houses a basket for my sewing machine supplies (such as extra needles, cords) and my drawing supplies.
The ribbon spools was my most recent project. I tried storing the spools on dowel rods but found that if I made the rods long enough to fit in the pre-drilled holes, I ended up scraping the sides each time I took the rod off. Which I would have to do when I used up a ribbon or added more. Not a big deal now, but once the table is painted I would end up with a scrape. Not cool.
Fortunately I had bought some curtain rods a while back that I had been meaning to return to the store. Never got around to it, but that's okay because I found a way to use them here. Now, these rods hook onto metal plates that are screwed into the wall. So, they lay flat. That wasn't going to work for me, however, because I didn't want to screw the plate into the back of the desk. I wanted it on the sides. Because I'm thrifty, and pretty determined, I found a way to make it work. I simply got my pliers out and bent the piece that sticks out (that you put the rod on) out a little, so that I could still use the rod. That explanation probably makes no sense, so I'll try and post a tutorial on that. Anyway, to put it in simple terms - it worked and I now have a great storage space for ribbon spools.
This side also houses a basket for my sewing machine supplies (such as extra needles, cords) and my drawing supplies.
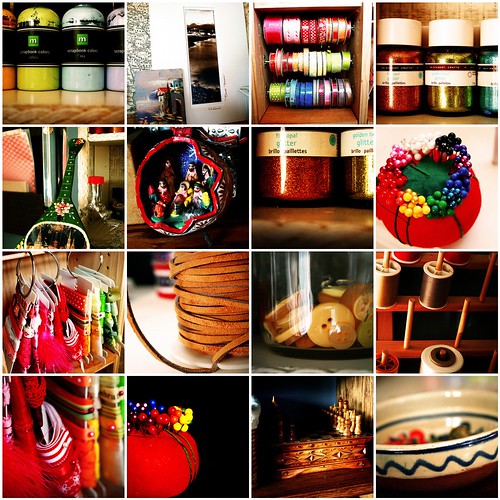
Here's more pics from around the studio:
1. Paint, 2. Art, 3. Ribbon-03, 4. Glitter-02, 5. Souvenier-03, 6. Souvenier, 7. Glitter, 8. Pincushion, 9. Ribbon-04, 10. Leather, 11. Buttons, 12. Thread, 13. Ribbon-02, 14. Pincushion-02, 15. ChessSet, 16. Souvenier-02
Friday, February 13, 2009
How To: Crayon Valentines
I take great joy in crafting gifts for my students in my kindergarten class. Every Halloween, Christmas, Valentine's Day, Easter, and end of the year I get my students something special. Sometimes I use digital scrapbooking elements to make treat toppers and fill the bags with goodies. Other times I give my students a book. I've even made bookmarks. Those were fun, and I'll share a tutorial later.
This Valentine's Day I decided to make a unique card using crayons. Using silicone molds and an ordinary box of crayons, I created my own heart crayons which I adhered to a handmade valentine card. CUTE!

These were relatively easy to make. You'll need the following items:
Preheat your oven to 275 degrees. In the meantime, remove the paper from your crayons and break into small pieces. Wrap a baking tray in foil (to protect your tray and oven). Place the pieces of crayon in the silicone molds. (Yeah, sort of forgot to take a pic of this part!)
I filled the molds about 3/4 of the way full, but you can fill them to the top if you like. As mentioned earlier, I made 24 valentines and used almost the entire box of 64 crayons. I could have filled the molds higher, but I found that 3/4 full made it easier to get the molds in and out of my toaster oven. (Those of you familiar with my oven understand why I chose to make these in the toaster oven instead of the actual oven.) Don't be cheap, though. Fill those babies, otherwise your homemade crayon will be tiny and fragile.
Put the tray of molds in the oven for ??? Oh gee whilackers (how in the world do you spell that?), I forgot how long. I will figure that one out and post it. In the meantime, if you try this before I post the actual time, just eyeball it. 15-20 minutes, I think. If it's completely melted (aka in liquid state) then it's good. If there are lumps of crayon, keep on baking. The longer you bake the crayons, the more the colors will mesh together. So, to get that great marbled effect, bake them until just melted.

Okay, so they aren't the most appetizing looking things. Hey, you aren't eating them, so who cares? (Oh, this reminds me, don't use these molds for any edible baking projects. Unless you like crayon and wax in your food. In that case, be my guest.) There will be a lot of wax/oil at the top of the heart, but don't be alarmed. And, because of this, it is harder to see your crayon colors, but trust me - they are there. Let the molds cool for 1 hour (2 hours if using a larger size). Then, pop those suckers out and enjoy their cuteness!

Wait, you aren't done yet! You need to get these babies on some cards. This is so easy, it just makes you want to slap your momma. Okay, not really. Seriously, who came up with that saying?
I wanted to card to be simple (and use less of my ink) but get the picture across that these are crayons. So, I created a cute image using Photoshop. And, you can download it and use it, too. I saved it in .jpeg format, so any photo software (including the basic one already installed on your computer) will open and print it. To save the image, click on it to open the full-size version. If you are a PC, right click, then select "save image as," and then proceed to save it somewhere that you will find it. If you are a Mac, then you probably are computer literate and know how to save images to your computer. (No offense, PCs.)
There are two versions. One has a "to" and "from" so you or your child can fill that out. The other has only a "from" for those of us who are in classrooms where you are asked to leave off children's names. Trust me, there's a reason why. Can you imagine trying to help 25 children find 24 other children's individual valentine goody bags or boxes? Madness, sheer madness. Leaving off the name of the recipient is much easier because the child can then drop and go, from bag to bag. I digress, here are the images.


After you have downloaded the card and cut them out, adhere two 3-D glue dots (one on top of the other) to the center of the white space in the card. The reason you will need two is because the crayons often are a little bit higher on the edges, creating a slight dip towards the center. So, unless you want to spend hours sanding your crayons down, go ahead and use two dots.

Here you can see that I have placed two glue dots on my card. I use 3-D dots because they are thicker. Also, you can see a crayon heart lying face down. What you see is the wax that rose to the top during baking. Once I flip the heart over, you will see all the heart in its marbled glory. Place the heart on the glue dots.

This Valentine's Day I decided to make a unique card using crayons. Using silicone molds and an ordinary box of crayons, I created my own heart crayons which I adhered to a handmade valentine card. CUTE!
These were relatively easy to make. You'll need the following items:
- Silicone cupcake molds - I used some mini-heart shape molds for this particular project. The card size is rather small (2x3), so the mini size worked best. I got mine in the valentine section at Wal-Mart. I know that Target also had some. Of course, you are not limited to heart shapes. But since it was a valentine card, I decided to go with the theme. There are some tin heart molds out there, and feel free to use them. However, silicone molds are very easy to use, and the crayon pops out. I really love them!
- Crayons - I used almost an entire box of 64 crayons on this project (24 mini-hearts total). I also used an assortment of colors.
- Cardstock
- Colorful valentine image (See below for a link to download)
- Glue dots - preferably 3-D glue dots; you will use 2 per valentine card
- Foil
- Oven or toaster oven
Preheat your oven to 275 degrees. In the meantime, remove the paper from your crayons and break into small pieces. Wrap a baking tray in foil (to protect your tray and oven). Place the pieces of crayon in the silicone molds. (Yeah, sort of forgot to take a pic of this part!)
I filled the molds about 3/4 of the way full, but you can fill them to the top if you like. As mentioned earlier, I made 24 valentines and used almost the entire box of 64 crayons. I could have filled the molds higher, but I found that 3/4 full made it easier to get the molds in and out of my toaster oven. (Those of you familiar with my oven understand why I chose to make these in the toaster oven instead of the actual oven.) Don't be cheap, though. Fill those babies, otherwise your homemade crayon will be tiny and fragile.
Put the tray of molds in the oven for ??? Oh gee whilackers (how in the world do you spell that?), I forgot how long. I will figure that one out and post it. In the meantime, if you try this before I post the actual time, just eyeball it. 15-20 minutes, I think. If it's completely melted (aka in liquid state) then it's good. If there are lumps of crayon, keep on baking. The longer you bake the crayons, the more the colors will mesh together. So, to get that great marbled effect, bake them until just melted.
Okay, so they aren't the most appetizing looking things. Hey, you aren't eating them, so who cares? (Oh, this reminds me, don't use these molds for any edible baking projects. Unless you like crayon and wax in your food. In that case, be my guest.) There will be a lot of wax/oil at the top of the heart, but don't be alarmed. And, because of this, it is harder to see your crayon colors, but trust me - they are there. Let the molds cool for 1 hour (2 hours if using a larger size). Then, pop those suckers out and enjoy their cuteness!
Wait, you aren't done yet! You need to get these babies on some cards. This is so easy, it just makes you want to slap your momma. Okay, not really. Seriously, who came up with that saying?
I wanted to card to be simple (and use less of my ink) but get the picture across that these are crayons. So, I created a cute image using Photoshop. And, you can download it and use it, too. I saved it in .jpeg format, so any photo software (including the basic one already installed on your computer) will open and print it. To save the image, click on it to open the full-size version. If you are a PC, right click, then select "save image as," and then proceed to save it somewhere that you will find it. If you are a Mac, then you probably are computer literate and know how to save images to your computer. (No offense, PCs.)
There are two versions. One has a "to" and "from" so you or your child can fill that out. The other has only a "from" for those of us who are in classrooms where you are asked to leave off children's names. Trust me, there's a reason why. Can you imagine trying to help 25 children find 24 other children's individual valentine goody bags or boxes? Madness, sheer madness. Leaving off the name of the recipient is much easier because the child can then drop and go, from bag to bag. I digress, here are the images.
After you have downloaded the card and cut them out, adhere two 3-D glue dots (one on top of the other) to the center of the white space in the card. The reason you will need two is because the crayons often are a little bit higher on the edges, creating a slight dip towards the center. So, unless you want to spend hours sanding your crayons down, go ahead and use two dots.
Here you can see that I have placed two glue dots on my card. I use 3-D dots because they are thicker. Also, you can see a crayon heart lying face down. What you see is the wax that rose to the top during baking. Once I flip the heart over, you will see all the heart in its marbled glory. Place the heart on the glue dots.
How awesome is that? You can have lots of fun playing with different color combinations!
Thursday, September 25, 2008
Fall Wreath

The glittered pumpkins are my own creation using Martha Stewart glitters (these are by far my favorite glitters ever!). They are simple to use:
First I brush glue on, one small section at a time. I use the Martha Stewart glittering glue but any liquid glue would work fine.

I use a paper plate (this will come in handy toward the end) underneath my glittering. Pour glitter over the "glued" section. The paper plate will catch the excess glitter which you can use again. You don't have to use a paper plate; just find something that is flexible. I have found a paper plate it easier than just paper. Again, you'll understand this when you read through to the end of my directions.

Continue each section until the entire thing has been glittered. You might have to go back and fix a few spots. Now, here's the explanation for why I use a paper plate. Once I'm finished with my glittering, I bend the paper plate and pour my glitter back into the container. No wasted glitter, which in my book is a "good thing."

You can find the Martha Stewart glitters online, in Michaels, and at Wal-Mart. I buy mine from Michaels because they are sold in larger amounts. Wal-Mart has some, but these are more like "sample" sets because you do not get much.
Subscribe to:
Posts (Atom)